
Planting A Kieffer Pear Tree (Pyrus communis x P. pyrifolia)
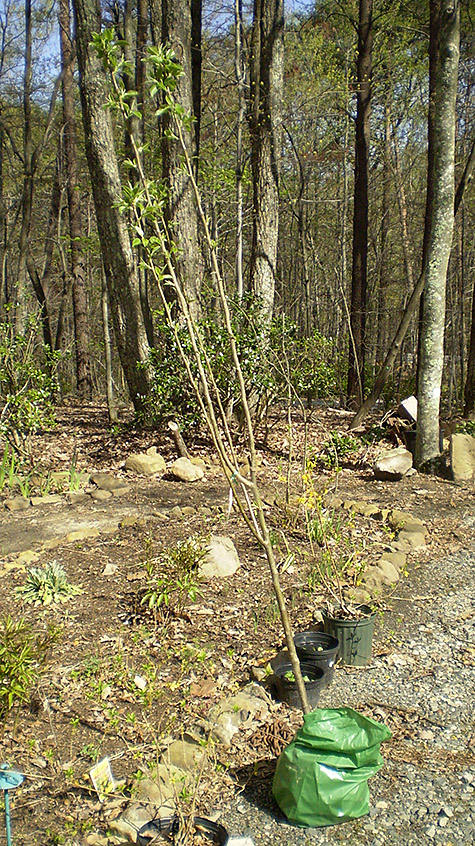
I have been wanting to add a pear tree to the little orchard. I was at a local Big Lots shop and they had several varieties of trees, including fruit trees, outside on the pavement. One of the varieties of pears they had was a Kieffer pear. The nice thing about Kieffer pears is they are self-pollinating which means it will bear fruit with just one tree. I looked over the Kieffer pear trees and found one that was nicely shaped and decided it would fit in my old grey Buick so off inside I went to purchase it. The price, excluding tax, was $15.00.
Kieffer Pear at A Glance
- Bears Large Yellow Fruit
- Self Pollinating
- 15' to 30' tall - 12' to 20' spread
- Zones 4 to 9
- Full Sun
- Well drain soil
- Soil pH Level 6.0 - 7.0
- Blooms mid April
- Harvest late season
- Blight resistant
- White, crisp, juicy, coarse texture flesh
 Kieffer Pear |
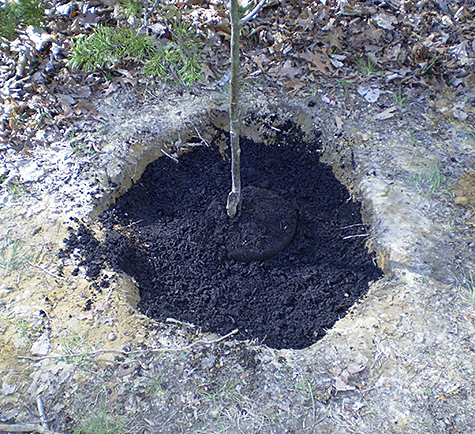
I selected a place in the little orchard where I thought the tree would receive as much sun as possible. I have a lot of trees surrounding the gardens and they do limit the amount of sun certain areas of the gardens receives. The first job in planting the tree is of course digging the hole. You want to dig a hole three times the size of the root ball.
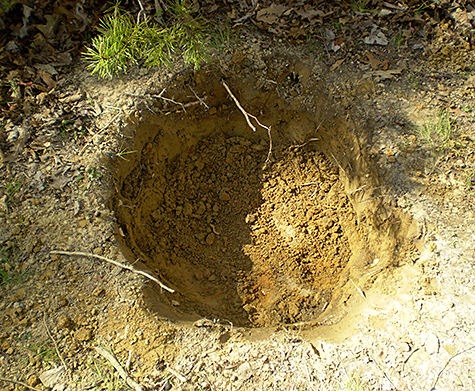 Hole three times size of root ball |
Once you have your hole large enough, fill the bottom with some rich organic composted top soil and mix it well into the bottom of the hole. Add more top soil as needed. You want to plant your tree at the same depth it was growing before it was dug up at the nursery. We dig the hole deeper and fill with rich organic top soil so that the roots have plenty to feed from so the tree gets a good growing start.
 Add rich organic top soil to the bottom |
Finish filling the hole to the level you think the bottom of the root ball will be sitting at the correct depth. Using your foot, lightly compress the soil in the bottom of the hole. Don't compact the soil, just lightly compress it. The reason you want to do this is that when you water the tree and the soil is too loose, you will find your tree sinking slightly; the light compressing of the soil will prevent this. Keep the inner bag around the root ball and set the tree into the hole, note if the height is correct; remember that you want the tree planted at the same depth it was growing at the nursery. If the tree is too low or too high, add or remove soil as necessary. Once you have the tree at the correct depth, you want to plum the tree by eye using points 90° apart.
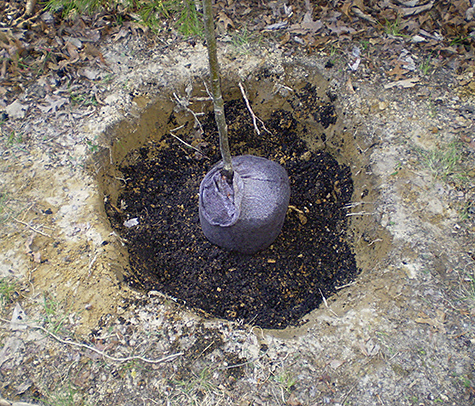 Setting the tree in the hole |
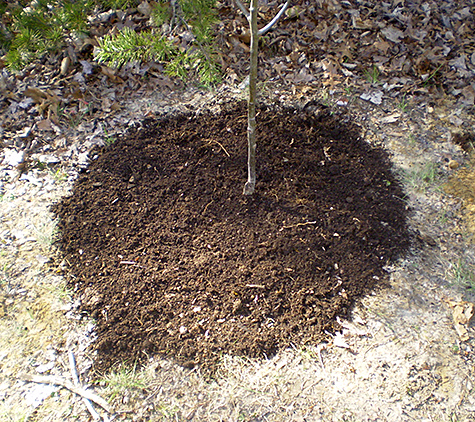
If your tree's root ball is covered in burlap, you can just slit the burlap without a lot of worry of completely removing it as it will decay in the soil. However, many trees today have the root ball covered with a nylon bag. You want to completely remove this bag from the root ball, I used an utility knife and cut the bag from the root ball and then gently tugged it from under the root ball. Your tree will now be sitting at the correct depth and will be plumbed; all that is left to do is to finish filling the hole with rich organic topsoil. I ran out of the topsoil I had so I dug into my compost pile to finish filling the hole. Once you have finished filling the hole, give the tree a good drink of water, and if needed, level out the soil around the tree. I don't bother with building a little dam around the tree as some do because the water hydrate in the little orchard makes it easy to keep the tree water. You want to water the tree so that it receives about an inch of water per week. You don't want to over water; you don't want the roots standing in water.
 Filling around the root ball |
The finish job, I now have a pear tree in the little orchard. It will take a few years before I can expect to see any pears although a few pears may appear in the second year. With a young tree you want to make sure the limbs grow study enough to support the fruit; if you see a lot of pears on small limbs, it is possible the limbs will break. You may want to remove fruit from such limbs until the tree grows strong enough to bear the load.
 The hole completely filled |
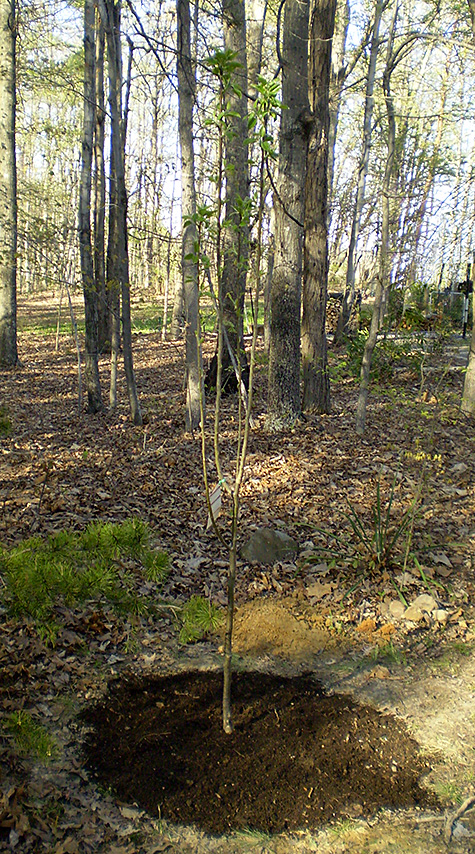 My pear tree in its new home |
Kieffer Pears are the pears I use in my pear preserves and in my pear relish; visit my kitchen blog for the recipes: http://kitchen.secretcorners.net. Kieffers are better pears to use in cooking although allowed to fully ripen they are sweet and juicy.
")