
Planting Sweet Potatoes
One crop that Mum and Dad always planted was sweet potatoes. Mum and Dad always planted a big garden every year; we were a family of nine including Mum and Dad. Feeding seven children required a lot of food and the garden was an important source to help stock the pantry. Mum told me a story about digging sweet potatoes in the corn rows one year. The family was digging the sweet potatoes and my oldest brother saw cracks in the corn rows beside the sweet potatoes. He mentioned the cracks to Mum and told her he thought there were sweet potatoes out in the corn row. Mum was sceptical but dug anyway. As it turned out, the sweet potatoes had sent runners out into the first couple of corn rows and there were some very large potatoes on those runners.
Soon after we moved to our present location and got the little valley cleared, Mum and I tried planting sweet potatoes since the little valley soil contains more red clay. Sweet potatoes love the iron found in red clay soil. However, we found the little valley tended to stay too wet from the rain coming off of the slopes. If sweet potatoes get too much water, they will produce small stringy tubers instead of the nice rounded ones. Mum and I never tried planting sweet potatoes in the little valley again. However, this year I decided I would try planting sweet potatoes since I noticed the lower end of the little valley tended to stay drier than the upper end.
 Three 7 meters (22 feet) rows of sweet potatoes (Click image for a larger view) |
During a recent visit to a local farm centre I noticed a bin of sweet potatoes outside the entrance. There was no indication of the variety or the price so I went inside to enquire about the potatoes. They were Beauregard and were $3.95 a bundle plus sales tax. At one time here in the Kangaroo state plants and seeds were tax exempt. However, the powers that be decided to change that a few years ago. I would have liked to have found the ones that Dad use to grow. I am unsure of the variety, but if I was to see the leaf I would recognise it in an instant as the leaf was distinctive from the other varieties. Dad grew his own potato slips each year, growing them in a bed of rotted sawdust. The farm centre had placed the slips in a plastic crate and added water to help keep the plants healthy. Sweet potato slips are pulled and shipped dry rooted and I have seen farm centres just put the crates out. It is not a requirement; however, it does make the slips stay in better condition before they are sold.
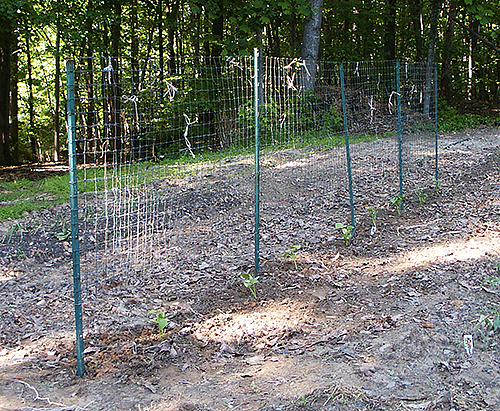
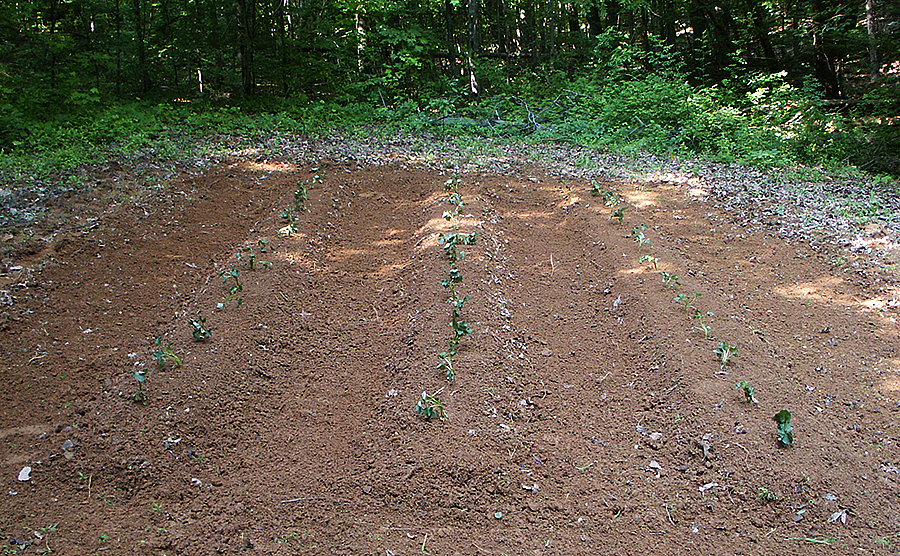
The hardest part of planting sweet potatoes is creating the raised bed. The local commercial growers of strawberries use raised beds that are 91-122 cm wide (3-4 ft), with a double row planting of strawberries on each raised bed. There will be acres of these raised beds and I know they are not made by hand. I would love to find an implement for my 8N tractor that would help me to create these raised beds. If any of my readers know of an implement or hoes for my 8N that would help to create these beds, please let me know. I spaced my raised beds 122 cm (4 ft) apart; I did not measure the height of the beds but the recommendation is around 20 cm (8 in). I just worked until I thought I had the bed high enough based on how Mum showed me to plant sweet potatoes. The length of the rows were approximately 7 meters (22 feet).
Once the raised beds are created, the actual planting of the sweet potato slips is easy. Somewhere around here is a dibble that my grandfather made for my Mum to use in the gardens. It is made of oak or hickory and has lasted all these years. Since I did not have grandfather's dibble at hand, I quickly made one from a dead branch of a tulip popular that I found beside the garden. Tulip popular is soft wood and I quickly had it to a point. I left the dibble long to use as a guide on spacing of the plants. The recommendation for spacing is 30-46 cm (12-18 in); however, I just guess my spacing estimating around 46 cm (18 in) on my dibble. When we use to plant a large sweet potato garden, we used a hand operated planter that came to a point. The planter held water in one section and you would stick the planter into the soil, add a plant to the plant section and pull the trigger and pull the planter out of the soil. The planter would push the soil to the side, add some water, and the plant would drop into the hole. If the soil was lose, it would fall back around the plant. Sometimes we would have to push the soil back around the plant. To plant the sweet potato slips, I used my dibble, making a hole and placing the slip into the hole. I then pushed the soil back around the slip. The garden in the valley was actually a bit too wet; however, I needed to get the slips planted as soon as possible. I did not add water but we got a torrential downpour of a storm this evening. I will need to check for any damage to the beds. I planted three rows; however, I had enough plants left to do a fourth row. The roots were not as established on the left overs, so I temporary hilled them in to allow them to put out more roots. Plus, I will wait to see if any of the ones I planted don't survive and use the left overs for replacing any that don't make it. The rest I will put into a fourth raised bed when they are a bit more established.
Sweet potatoes need to be dug before frost can bite the plants. According to Mum, if the plants die back from frost, it will make the sweet potato bitter. I don't know if this is true or not since we always pulled the plants off of the beds before any frost. Sweet potatoes need to be cured before storing. After we harvested the sweet potatoes, we would wash any dirt from the potatoes. You have to be careful when washing sweet potatoes and handling them before they have cured as the skin is very tender and will bruise easily. Once the dirt was removed from the sweet potatoes, we would place them in the sun to cure. It is important to not let sweet potatoes get below 10°C (50°F) as it will make the potato bitter. If the weather forecast called for low temperatures, we made sure to bring the potatoes inside. After the initial curing outside in the sun, you need to bring them inside and allow the sweet potatoes to continue curing at 30°C (85°F) and if possible with the humidity around 85%; although we never worried about the humidity level since it was out of our control. Once the potatoes have cured, store them in a dry location where the temperature will not drop below 10°C (50°F).