Back Garden Iris Bed
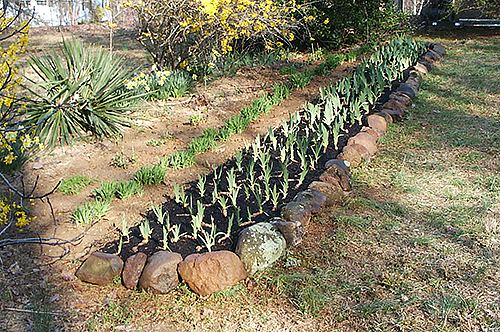
In the back garden I have a couple of flower beds with bearded irises. Unfortunately, Japanese stilt grass has become a problem in my garden and had invaded one of the bearded iris beds. Japanese stilt grass grows fast and can quickly choke out plants; it grows tall and dense blocking sunlight and robbing the flowers of nutrients. I had intended to redo the flower bed in autumn, the time one should divide irises; however, I let the time slip away from me. Earlier this spring I decided that before I did anything else in the gardens, I would redo the iris bed.
I decided to move the flower bed forward and constructed a new border using the stones on the property. I like using natural stones for my borders and since I have a source from the property, the cost is free. Once I got the border built, I filled it with new soil free of the stilt grass. I did not want to use the soil from the old bed because irises should not be mulched and I wanted to avoid transferring any of the seeds or roots of the stilt grass to the new iris bed. Once the new bed was ready, I transplanted the irises one by one, moving them forward from the old location to the new location.
The best time to plant bearded irises is late summer through autumn. However, one can plant in early spring. Planting bearded irises in early spring can prevent them from flowering for a year or two and can slow development. Bearded irises should be planted where they can receive sun for at least six hours. Some of the historic cultivars appear to tolerate more shade than some of the newer cultivars. Bearded irises do not tolerate standing water; raised beds can help with drainage. One of the biggest mistakes with planting bearded irises is planting them too deep. When planting bearded irises, you want the top of the rhizome to be above the level of the soil. Carefully spread the roots out and then push the soil in and around the roots; then firmly but carefully pack the soil around the roots to remove air pockets. Once you have finish planting the bearded irises, water the bed giving it a good soaking. When it is time to fertilise the irises, usually around mid April, use bone meal, superphosphate, or a low nitrogen fertiliser such as 6-10-10.

1 comment
This post has 7 feedbacks awaiting moderation...


