Using Mulch in the Garden


on Saturday, May, 08 2010 @ 01:13:19 pm (770 words)
In General [ 6663 views ]

Double Ground Hardwood Mulch

My favourite mulch to use in the gardens is double ground hardwood mulch. Since I have a lot of flower beds to mulch, I usually order my mulch delivered and it comes out cheaper to buy it in bulk instead of the little polyethylene bags at a garden centre. When buying mulch in bulk, it is often sold by the scoop and the size of the scoop depends on if it is a small bobcat loader, or a full size loader. A full size loader is approximately two cubic meters (2.5 cubic yards); however, when they scoop the mulch from the pile, you will actually get more as the mulch is rounded on the bucket.

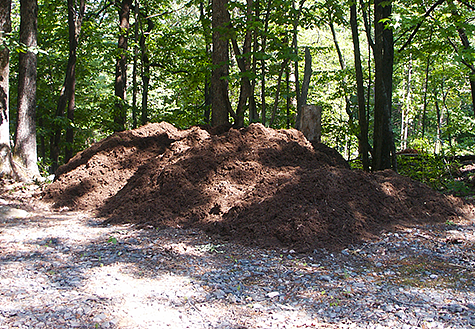
When I rang to enquire about having my mulch delivered, I was informed they sell it delivered in two quantities, a large load and a small load. The large load was six scoops and the small load was 4 scoops. The problem there was the small load was still more mulch than I needed, and the price of the small scoop was $225.00. I was told they do sell it by a single scoop if you haul it yourself. Since I do not own a truck, hauling it myself was out of the question. Evidently the woman I was speaking with took pity on me and said that she would see if they would haul two scoops for me; I did not live that far away and the haul would be a short one. A few minutes later she rang to let me know they would haul two scoops of double ground for me at a price of $110.00. I estimate the load of mulch delivered to me is at least six cubic yards (4.6 cubic meters) or better.

There are a wide variety of mulches available for use in gardens, both natural and manufactured. Stone, rubber, bark, pine needles, and ground wood are a few of the mulches available to the home gardener. Ground wood mulch is even available in several colours; red seems to be the post popular. Mulch is used for several reasons, the two main reasons being weed control and moisture retention. Mulch is also used for appearance, and if using a natural wood mulch, will add organic matter to the soil as it decomposes. Which type of mulch to use is a matter of personal taste and where it will be applied.

If one has a bed that will be replanted each year, then an organic mulch that will break down over the year will be best. The double ground mulch that I use will be decomposed by next year and I will work the organic matter into the bed. Wood chips and bark will last more than one season and are best to use where one would not be turning the bed for panting new flowers; a perennial bed is one example. Pine needles are an excellent mulch to use for plants that require an acid soil, but should be avoided around plants that do not thrive well in an acid soil. The main inorganic mulches used in home gardens are rubber and stone. Normally these mulches are used in areas that receive heavy traffic. Stone can be used as an attractive border in front of organic mulches. Rubber mulch is often manufactured to appear similar to wood chip mulches. One problem with using rubber mulches in large quantities is the off gassing of toxic chemicals and the associated odour.

When applying mulch you want to spread it to a depth of 5-10 cm (2-4 in). Avoid placing the mulch tightly around the base of the plants, you want to leave some space to avoid smothering the plant. When mulching around trees it is important to not pile up a thick layer of mulch around the base of the tree. A heavy layer of mulch can prevent water from reaching the roots. Furthermore, trees grow their roots at varied and specific depths and piling up a large mound of mulch around a tree effectively sabotages this depth and can harm the tree. Special tree mats are now available at most garden centres to use around smaller trees. These mats allow the water to reach the roots but block the growth of grass and weeds and allow for easy mowing around the base of a tree.

While not a necessity, using mulch in the gardens can help to reduce maintenance by reducing the growth of weeds and in water retention. Mulch also adds an attractive appearance and the use of organic mulch helps to add compost to the soil as the mulch decays.


How to Plant Tomatoes


on Sunday, May, 02 2010 @ 12:37:09 pm (897 words)
In General [ 20158 views ]

Tomatoes are a popular addition to most home gardens and for good reasons; one is they are easy to grow, and two no shop brought tomato can compare to a vine ripen one. Commercial tomatoes are picked green so they can tolerate being packed into large containers without being crushed. Once they have reached the packing house, they are loaded into a container and ethylene is pumped into the container to allow the fruit to turn red; ethylene is the gas produced by fruits that allow them to ripen. The problem with this is they are still technically green, unripened tomatoes, without the flavour and textured of a ripe tomato pulled fresh from the vine.

Big Boy Tomato Plants

I usually buy my tomato plants in four or six packs selecting healthy plants with good growth and with good colour to their leaves. Last year I was tempted by the lower costs of buying bulk plants at Lowe's gardening centre. After separating the plants I found that many were of poor quality. Furthermore, with the extra work of potting the plants and caring for them to reach the point where they could be transplanted to the garden, the savings quickly evaporated. You can also grow tomatoes from seeds, starting them indoors or in a greenhouse. However, with the small number of plants I plant, I have found it very reasonable to just buy the plants from a nursery. Each four pack was $1.25 at a small locally owned plant and produce shop. The shop owner and I shared a similar life growing up in a large family with the children helping to grow food.

Tomatoes can be grown in the ground or in a container; the procedure for both is the same. The upside-down tomato planter is nothing but a gimmick. When these upside-down planters first appeared, they were selling for $29.95; I saw one at a local shop now selling for $5.00. Instead of the gimmick planter, you can buy a cheap plastic pot that will be suitable for growing a few tomatoes on your patio.

Tomatoes are heavy feeders, and it is important to supply plenty of nutrients throughout the growing season. Tomatoes also need plenty of sunlight so select an area that will receive six to eight hours of sun a day. Start by loosening the soil to a depth of at least 30 cm (1 ft). This will allow the roots to quickly develop and good root growth equals to good plant growth which will equal to plenty of fruit. Once the soil is loosened, place a small handful of 10-10-10 fertiliser and a generous scoop of powered limestone; do not use pellet limestone, where you are going to plant the tomato and thoroughly mix both into the soil. It is important to mix the fertiliser well so you do not burn the roots. Tomatoes need calcium and powered limestone is mainly calcium carbonate: CaCO3. A lack of calcium will cause blossom end rot and you can lose most of your tomatoes if the soil is lacking in calcium.

The next step is to carefully remove the tomato plant from the tray. To make removal easier, carefully squeeze the sides so the plant will slip out. Tomatoes can produce roots along the stem of the plant, so we will plant the tomato deeper than it is in the tray. Planting the tomato deeper will allow it to develop even more roots for vigorous growth. If the plant is root bound, carefully separate the roots being careful to not break any roots more than necessary. Pinch off the bottom few leaves to allow easy placement of a paper collar around the plant. The paper collar is to prevent cutworms from getting to the plant. Even if you don't think you have cut worms, placing the collar is a good idea; better safe than to go out and find your tomato plants on the ground after the cutworms fed on them. I use old newsprint to make the paper collar. I tear off a small strip and wrap it around the plant. Using a digging trowel, scoop out enough soil to allow planting the tomato to a depth that will allow the top of the paper collar to be above ground level. Place the tomato in the hole and carefully push the soil around the plant. The final step is to give the plant a good watering to help prevent it from going into transplant shock.

Note the Paper Collar

I space my tomato plants 61-90 cm (2-3 ft) apart. The spacing of plants is determined by the size of the mature plants, and the amount of room needed for the roots so they do not compete for nutrients. If you are not going to use a support system for your tomatoes, and I have grown them with and without support systems, then you will need to space the plants further apart. I use a support system so the plants can be closer together. Also, I will add additional fertiliser around the plants throughout the growing season.

There are many cultivars of tomatoes and it may be difficult to know which one to grow. If you are not familiar with the cultivars, then grow a few of each and next year you can grow the one you liked the best. I ended up planting sixteen Better Boys, eight Romas and four yellow Pear.


Snowball Bush (Viburnum opulus 'Sterile')


on Wednesday, April, 28 2010 @ 02:19:45 pm (388 words)
In General [ 74406 views ]

Snowball Bush (Viburnum opulus 'Sterile')
Snowball Bush - Close

A lot of confusion exists over the snowball bush as this common name is used for several plants, including a variety of hydrangea. Furthermore, there is a difference in appearance between the wild Viburnum opulus and the cultivated one. If one is looking to plant a particular snowball bush in one's garden then one needs to establish which particular species before heading out to the garden centre or nursery. I have found that even nurseries are often confused on which species of snowball bush they are selling, so be vigilant.

The most common snowball bushes found in gardens are the Old Fashioned Snowball Bush (Viburnum opulus ?Sterile?), Common snowball (Viburnum opulus 'Roseum'), Japanese snowball (Viburnum plicatum); and the Chinese snowball (Viburnum macrocephalum). The snowball bush in my back garden is the Viburnum opulus 'Sterile'. The Viburnum opulus 'Roseum' gets it name from the petals of the snowball turning a faint pink colour as the blooms start to fade. My snowball bush is sterile and does not produce the red berries as some of the other varieties do. The snowballs first appear as light green in colour and turn to snow-white in colour as they mature. The flower clusters can be quite large; sizes of 20 cm (8 in) are not uncommon. My Viburnum opulus blooms in the spring and the blooms will last a few weeks before they start to drop.

Snowball bushes are easy to grown and require little maintenance. While they prefer full sun, they can do well in partial shade. As with most plants, they do not like to stand in overly wet soil for long periods of time and root rot can occur if they do. You want to plant snowballs in a soil that is rich in humus and drains well. You don't want to over water; no more than once a week should maintain the water content of the soil for proper growth and flowering. Snowballs can tolerate a range of ph, either alkaline or acid soils. It is important to understand that snowballs are spring bloomers; if you prune, you should prune after the blooms are gone or you will be removing the flower buds. Snowballs, if left to grow naturally, will reach a height of 3-4 meters (10-14 feet) with a similar spread.