Weekend Project, a New Bed


on Tuesday, May, 25 2010 @ 10:40:25 am (432 words)
In General [ 1750 views ]

The weekend found me busy between working on the side garden and constructing a new bed around the front garden Angel's Trumpet. With the cold winter we experienced last year, I was concerned the Angel's Trumpet might not have survived. However, I saw that it was sending up new growth and decided to move ahead with constructing the new bed around it.

The Start

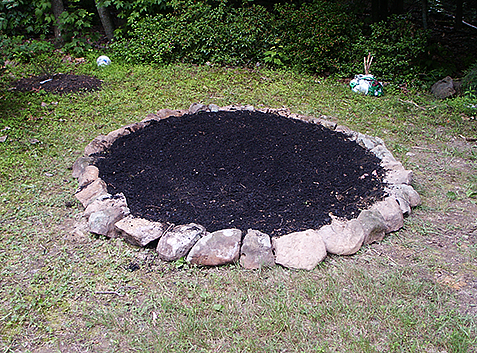
The soil in that area of the front garden is heavy clay, so I knew that plenty of organic matter would be needed to loosen the soil. I decided to loosen the soil first; establishing the size of the bed, and then construct the border. The border would be constructed from the same material as the borders for the other flower beds in my gardens; the natural stone found on the property

Finished Border

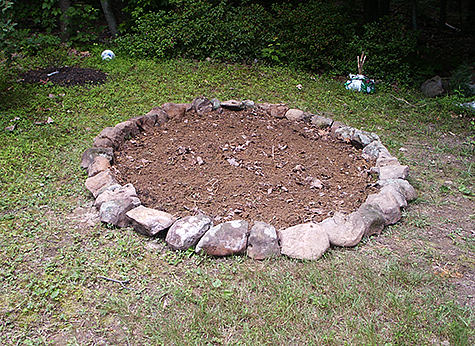
The finished bed is a rough oval shape about 2 metres (7 feet) by 3 metres (9 feet). I removed the Angel's Trumpet from the bed so I could work the organic matter into the clay soil without worrying about damaging the plant.

Waiting For The Plants

Once I had the organic matter worked into the clay soil, I replanted the Angel's Trumpet. Angel's Trumpet are not small plants; mine reached a height of 2 meters (7 feet). I placed the Angel's Trumpet at the furthest end of the bed and left plenty of room between it and the other plants I placed in the bed.

The Finished Bed

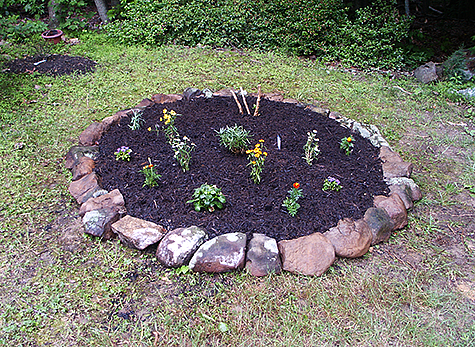
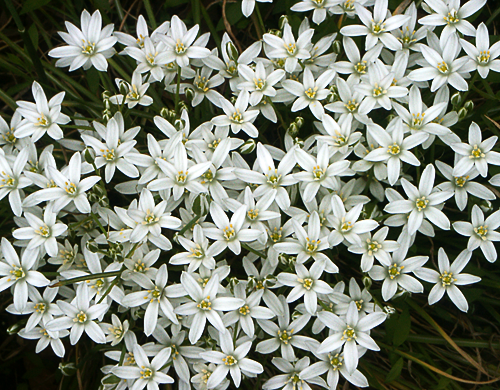
Once the Angel's Trumpet was back in place, I planted some annuals that I yet to place in any of the beds. At a small local vendor, I found a four pack tray of what was clearly a type of daisy; however, there was no sticker indicating the name of the plant. I enquired of the shopkeeper about the plant, but she could not remember and told me she would try to find out and let me know the next time I stopped by. Unfortunately, I have not been back to the shop in weeks and she has probably forgotten by now.

I was quite happy with the new bed; it is visible from the dinning area window and it is nice to be able to look out any window in the house and be able to view flowers in my gardens. The largest amount of time spent on the construction of the bed was in searching for the stones and transporting them to the site. Otherwise, the project is fairly quick to build. I also spent part of the weekend working on the side garden finishing the border and mulching.


Star Flower Ipheion-uniflorum


on Wednesday, May, 19 2010 @ 11:11:23 am (271 words)
In General [ 9887 views ]

Star Flower Ipheion-uniflorum

I was concerned that my Star Flowers, Ipheion-uniflorum, were not going to bloom this year. Star Flowers (Starflower) are early spring bloomers; and in the early spring we suddenly had hot days with temperatures of 35°C (95°F). Those hot days almost fooled the Star Flowers into thinking it was time to go dormant again. However, the days cooled back down and the Star Flowers did indeed bloom. I don't think the Star Flowers bloomed as heavily this year due to the stress of the hot days.

Star Flowers are early spring bloomers and after they bloom, they quickly store food in the bulbs and disappear. In fact, the leaves and flower stalks are already disappearing in my gardens. This can be a problem as I accidentally dug up a clump of my star flowers last year when I added a plant to one of my beds; I had forgotten they were there. I love these little flowers and I have several clumps of them around the gardens.

Star Flowers require very little care. I often find them growing in the grass and will relocate them into one of my beds. They will grow in partial shade to full sun. Star Flowers spread by self-seeding and from bulb offsets. If you find the blooms declining after a few years, the clumps need to be dug up and the bulbs divided and replanted; this needs to be done after the plant has died back and gone dormant. Star Flowers are planted from bulbs in the fall at a depth of 10 cm (4 in) in well drain soil. They are hardy zones 4-9.


Back Garden Rhododendron


on Saturday, May, 15 2010 @ 11:45:49 am (335 words)
In General [ 4562 views ]

Back Garden Rhododendron

The back garden rhododendron was covered in blooms this year; a gorgeous sight I enjoyed seeing as I worked in the back garden. We planted two rhododendrons in the back garden; however, one went into decline and I waited too late before trying to relocate it to save it. The remaining rhododendron has done well and has reached a height of 3 meters (9 feet) and blooms heavily each year.

Rhododendrons are a member of the genus Rhododendron of the heath family (Ericaceae). The genus Rhododendron includes heathers, mountain laurels, and azaleas to name just a few. In fact, there are 26 species of Rhododendron that are native plants of North America.

Rhododendrons are easy to grow and an excellent addition to the home garden. It is important for the soil to drain well as the fine roots of rhododendrons are easily blocked by fungi. Rhododendrons require an acidic soil (pH 4.5-6); fertilise each spring with a fertiliser specifically marked for acid loving plants. If the soil is very alkaline, the best way to acidify it is to use powdered sulfur. One result of the soil being too alkaline is chlorosis of the leaves; a condition that results in yellowing of the leaf between dark green veins.

The amount of sunlight will depend on the variety of Rhododendron you are planting; follow the information on the tag attached to the plant, or be sure to enquire at the time of purchase. Apply a 5-8 cm (2-3 in) layer of mulch around the base of the plant to help retain moisture, control weeds, and to keep the roots cool. Since rhododendrons like an acidic soil, a good mulch to use would be pine needles or pine bark.

With just a little bit of care, rhododendrons will flourish in the home garden. Rhododendrons are among some of the most popular shrubs for the home garden and for good reasons. Rhododendrons will provide a gorgeous show of blossoms in mid spring and provide green foliage during the summer and winter months.