Starting the vegetable gardens - and a bit of trouble with the Old Girl


on Wednesday, April, 27 2011 @ 08:55:02 pm (420 words)
In General [ 3970 views ]


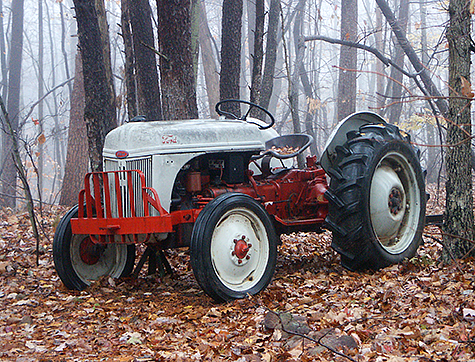
The Old Girl, A Good Friend
8N Ford Tractor

When I went to start the Old Girl to prepare my veggie gardens she would not start. 8N tractors don't have a lot that can prevent them from starting; it is either the spark, the fuel, or possibly both. Before I attempted to start the old girl, I removed the spark plugs; first blowing away any trash that could fall inside of the cylinder, and gave each one a cleaning. I also cleaned the battery cables and the connections to the coil. Dad converted this front mount distributor to use a six volt tubular coil; I need to do a blog on that conversion as the front mounted coils; even the new ones, tend to have a short life span. I discovered the reason I could not start the tractor was a lack of spark. After doing several tests and removing the distributor twice, the spark returned. I think I had a loose connection between the top mounted coil (that is actually bypassed with the tubular coil, but needed to pass the voltage to the points) and the second removal of the coil re-established the connection. When I attempted to start the tractor after getting the spark back, the Old Girl started with only a second turn of the engine.


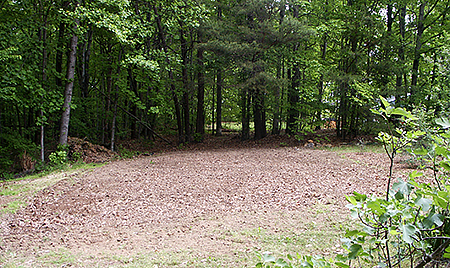
The Back Veggie Garden

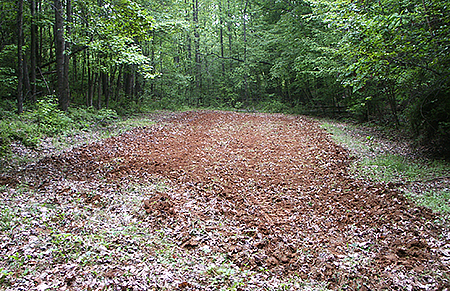
The Veggie Garden in the Little Valley

With the Old Girl running, preparing the gardens for planting was an easy affair. Well, easy after straining to get the implements connected to the tractor. Except for the cultivator, the other implements are very heavy and it is a difficult job for me to get them attached to the tractor's three point hitch. The disc harrow is especially difficult for me to attach and I had forgotten to put a block under the front of the harrow when I unhooked it the last time I used it; which meant that I had to try and lift it up.

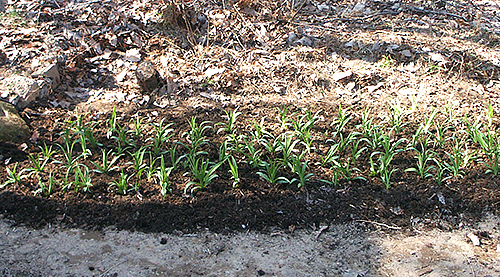
Today I worked between rains to get some of the garden planted because it will be too wet for the next several days. I manage to get a row of okra sowed, a row of red beets sowed, a row of yellow squash sowed, a row of green beans sowed, and a row of pumpkins sowed. The green beans and pumpkins were planted in the garden in the little valley. I also managed to replant the leeks that I had to dig up in order to prepare the back veggie garden.


Planting Grape Vines


on Saturday, March, 26 2011 @ 10:48:12 pm (695 words)
In General [ 20098 views ]

Last year during the mid season, Lowe's took their remaining bare-rooted grape vines and put them on clearance at $75% off. There were two in the bag and after the discount I paid only $1.25 for each vine. I picked out a niagara; a green grape, to go with the two mars grape vines I had planted earlier. Niagara grapes are a variety of the grape species Vitis labrusca. Niagara grapes gets the name from the region in which it was developed. In 1868 in Niagara County, New York, C. L. Hoag and B. W. Clark cross-bred Concord grapes with white Cassady grapes.

I was taking a bit of a chance with these grape vines because they had been out for some time and none of them showed any signs of life. I brought them home; mixed up some potting soil, and planted them in two old nursery pots I had. After some time I was happy to see them put out leaves and new growth. I let them stay in the pots during the rest of the year and only transplanted them this spring during some of the warm weather days we had recently.


Niagara Grape Vine

Grape vines are very easy to grow. They do best in full sun in a rich soil that drains well. It is important that the soil drains well for grape vines to avoid root rot. You want to space the vines apart to allow good air circulation between the plants. Good air circulation around the plants is important to prevent diseases and fungus from attacking the vines. The soil ph should be between 5.5 and 6.5 and you will need to test the soil to determine how you should treat it to either lower or raise the ph level depending on your test results.

I had already planted the mars grape vines and decided to clear the area below them and plant the niagara vines in a row behind the mars grapes. There was a tree that leaned out over that area and I wanted to remove that tree last year. The problem is that the tree leaned directly out towards my fig bush and a forsythia and simply cutting it down would mean it would destroy both. After waiting a few days I decided I would try notching the tree to force it to fall to the side of the fig bush and forsythia; a risk since the tree was leaning so much that it could just ignore the notch. I decided to be cautious and dug up the mars grape vine that was directly under the tree and set it aside. Using my hand saw; the tree was around 19 cm (7.5 in) in diameter where I made my cut, I cut the notch first and then started the second cut opposite and slightly above. When the tree started to fall I made my escape having established a path beforehand; trees can be unpredictable and they can also kick up when they fall, you want to be safely out of the way. Luck was with me, the main body of the tree fell where I wanted it to. A branch of the tree did hit the fig bush and broke the ends off of a couple of the branches; however, very minor damage.

Once I had the tree trunk cut into sections I could lift and out of the way as well as the branches cleaned up and piled on the brush pile, I prepared the bed for the grape vines. I had room to space the vines six feet apart with the rows spaced five feet apart. I mixed some extra composted soil into the ground where the vines would be planted. When I removed the vines from the nursery pots I was delighted at the amount of roots that had developed; a good root system means they will quickly establish themselves. Grapes need a support system to grow upon and that will be the next step. I will support the grapes as in a vineyard since I am interested in fruit production over vine growth. Pruning grapes is an important part of growing grapes so they produce lots of fruit.


Replanting Daylilies


on Monday, March, 14 2011 @ 05:45:30 pm (549 words)
In General [ 60103 views ]


Replanted Daylilies

I completed a task this weekend that actually should have been done in the fall; that task was replanting a daylily bed in the back garden. The bed of daylilies had become invaded by briar vines, poison oak, and small trees, and was a chore to try and keep clear of them. I decided the best thing to do was to dig up the daylilies, redo the bed, remove any remaining soil from the daylilies, replant and mulch. Hopefully I will now be able to properly maintain the bed of daylilies.

There are several cultivars of dayliles scattered around my gardens and most of them I have forgotten the names. Sister #4 gave me several varieties she had found that are heirlooms and I have yet to see what type of blooms they produce; it will be a treat to see what new additions I have. To get an idea of the many varieties of daylilies, over 35,000 cultivars have been named and marketed. Below is a photograph of the cultivar that I replanted in the back garden.


Daylily (Unknown Cultivar)

Daylilies are not true lilies; they belong to the genus Hemerocallis, which if broken down and translated means day beauty. The name comes from the short time the blooms will remain after opening. However, daylilies produce many blooms and will last for some time. Furthermore, not all daylilies bloom at the same time. In the front garden is a bed of daylilies that Mum planted containing two different cultivars of daylilies. When one has stopped blooming, the other will start so that the bed appears to have a prolonged blooming time. There are cultivars that blooms throughout the summer; Stella de Oro daylilies bloom through the summer and I have these located in the bed beside the side porch. I originally had them planted in front of the irises in the back garden but relocated them when I redid the iris bed last spring.

Daylilies are hardy perennials that are easy to grow. They tolerate many different soils, can thrive in partial shade, and can tolerate low rain fall. However, they do best in full sun with a moist well drained soil that is slightly acidic. Dayliles can be planted any time of the year, although the best time to transplant or divide daylilies is in the early spring or in the fall. Dividing in the spring may result in less blooms forming during the summer.

Planting daylilies is easy; once you have your bed prepared, scoop out a hole big enough for the roots to fit and deep enough so that the crown will be 2.5 cm (1 in) below the ground level. The crown is the part where the roots meets the stems. If you are dividing daylilies, dig up a clump of the plants and carefully knock the soil from the clump. Once you have the soil loosen you can carefully pull the plants apart. Daylilies can be divided every three to four years to improve the bed and bloom production. Daylilies are vigorous growers and can outgrow a bed in a few years. You can either transplant to new areas of your garden, or give them away to fellow gardeners; if those two options are not viable, then toss the excess plants onto the compost heap.